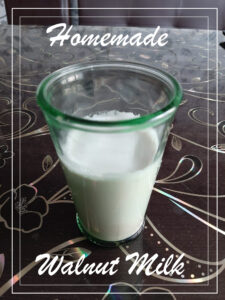
This post about how to make walnut milk at home contains affiliate links to amazon.com, which means I may receive a commission if you click a link and purchase something that I have recommended. While clicking these links won’t cost you any extra money, they will help me keep this site up and running. Thank you!
If you are on a dairy-free diet, then you certainly stop by the plant-based milk shelf in your supermarket. But the ones you find there are either too expensive or don’t taste so good. And now you are looking for alternatives so that you can still prepare your favorite recipes that require cow milk. Well, look no more! I will share a very simple and easy way to make your own walnut milk at home. Not only is it delicious, but it turns out quite cheap as well. Oh, and you will undoubtedly fall in love with its delicate flavor.
Here’s what you need to make walnut milk at home
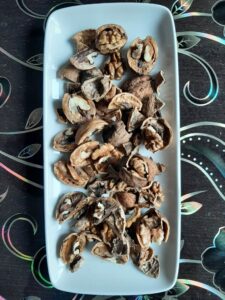
The first and most important thing is…you guessed it right! Walnuts, of course. What I basically do, is collect wild walnuts in the fall and leave them for a month or two to dry. If you live in a place where walnut trees grow, then you could do the same. These will guarantee that you will make organic walnut milk. If you can’t find any, then head to the supermarket! You could buy either whole walnuts in shells or just the nuts if you don’t feel like cracking them.
Secondly, you will need a small container to soak the nuts. For best results, soak the walnuts overnight. If you don’t have so much time, then you can soak for a few hours or even minutes. In this case, don’t use cold water. Instead, soak them in warm or even hot water to speed up the process. Soaking reduces mold and eliminates pesticide residue. Moreover, they are easier to digest that way.
Thirdly, get your blender ready! To make walnut milk, you will have to blend the nuts with some water. You can use whatever blender you have at home or even your nut chopper
Fourthly, a fine mesh strainer or a mesh bag so that you can strain your milk.
And finally, a container for your homemade walnut milk. I recommend a glass bottle or jar. Milk tends to go off more quickly if stored in a plastic container.
How to make walnut milk?
And now that you have everything necessary to make walnut milk at home, let’s get to work! Don’t worry, it’s so simple and easy that you will need as long as 5 minutes to prepare this delicious plant-based milk. Just follow this step-by-step guide and before you know it, you will be sipping from your coffee with walnut milk.
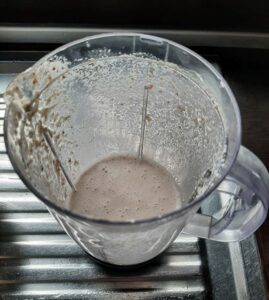
- To start with, rinse the soaked walnuts and put them in the blender. Then add some water (1:2). I personally like this ratio because the milk comes out more concentrated and takes up less space to store. If you don’t like it that way, you may either change the ratio to 1:3 or just add some water to the milk itself.
- Blend for 1-2 minutes. The more you blend, the finer the pulp will be.
- And finally, it is time to strain your milk by using either a strainer or a mesh bag. Don’t throw out the pulp, though! It is highly a nutritious product that you can use in numerous recipes. I love walnut chocolate cake and biscuits.
- Now that your walnut milk is ready, pour it into a container of your choice.
- Store in the fridge for as long as a week.
And basically, that is all it takes to make your plant-based milk from walnuts at home. Not more than a 5-minute effort but with amazing results. The taste is subtle and exquisite, not similar to any other plant-based milk. I adore it!
If this still seems like quite a complicated task, then you may consider buying a nut milk maker. Your walnut milk will be ready with a press of a button.
How to use it in recipes?
And now that your bottle is full of walnut milk and waiting in the fridge, you may be wondering how to use it in recipes. Well, basically, whenever a recipe calls for milk, you can substitute it with a walnut one. But I will share with you my favorites!

- What I most missed when I became vegan was milk for my coffee. As strange as it may sound, that is the truth. So, I started looking for plant-based substitutes. I tried soya, almond, coconut, oat and rice milk, but none of them was good enough for my coffee. Then, one day, while watching a bag full of walnuts that my husband had picked up, I thought to myself: „Why not make walnut milk?” And although I hadn’t seen such kind of milk in stores, I decided to give it a try. And it turned out to be the best coffee cream substitute I have ever tried!
- Another way I often use walnut milk is in sauces. Whenever I need cow milk for a sauce, I use walnut one instead.
- Cocoa pudding is one of my favorite desserts I prepare with walnut milk. Pour 800 gr of walnut milk into a cooking pot and turn on the stove. In the meantime Put 6 leveled tbsp. of all-purpose flour in 200 gr of walnut milk and mix very well, until smooth. Then pour the mixture into the pot with the warm (not hot) walnut milk. Stir all the time until it starts to thicken. Then add and sweetener of your choice and 2 tbsp of dark cocoa powder. Stir again and remove from the stove. Finally,serve in cream glass cups and decorate with chopped nuts or coconut cream. Enjoy!
- 5-min summer soup. It will take no more than 5 minutes to prepare this wonderful soup that is more suitable for the hot summer days but can be served in winter as well. Pour 500 ml of walnut milk into a big bowl. Then grate 150 gr peeled cucumber. Alternatively, you can finely chop it. After that, add the cucumber to the milk and add some salt to taste. Squeeze some lemon juice and add 1 tbsp olive oil. Finally, serve with chopped walnuts and dill on top, and enjoy!
- And who doesn’t like pancakes? Yes, you can certainly make pancakes with walnut milk. Blend one banana with 1 cup of walnut milk. Add a pinch of salt and sugar. Then, add 2 tbsp of melted coconut oil, 1 ½ cups of all-purpose flour, and 1 tsp of baking powder. Blend all the ingredients well until the mixture becomes smooth. Then cook in a non-stick pan on both sides until ready and golden brown. As for the topping, the choice is yours!
And if you are looking for the best toy for your kid to help form healthy eating habites, then read about it here.